After tinkering with Google Sheets functions during NDP, I decided to try my hand at creating my own personal finance/budgeting app. Here is a quick 5 step guide to create a simple budget app using AppSheets!
Table of Contents: 📖
- 5 Step Guide in Creating a Personal Finance App
- Concluding Thoughts
One of the things that many students can relate to is that most of us are probably broke💸 in one way or another.
During an idle point of time in my life, I was reaching peak levels of boredom 🥱. In turn, that gave me the inspiration needed to experiment with things out of my comfort zone. Wanting to utilise the skills I have acquired in navigating Google Sheets, I decided to create an app which can be used regularly by myself: a personal finance tracker app!
This begs the question: why don’t I just use the well-furnished finance applications available in the App Store? Well, my justifications were that I had time to spare, and I wanted to make a personalised app that directly suits my uses.
Here goes! 🙃
5 Step Guide in Creating a Personal Finance App
Step 1: Setting Up Google Forms
Here is a preview of the google forms I have used to tabulate the results.
While creating the google forms, I categorised my cash flow accordingly into the sub-categories as desired.
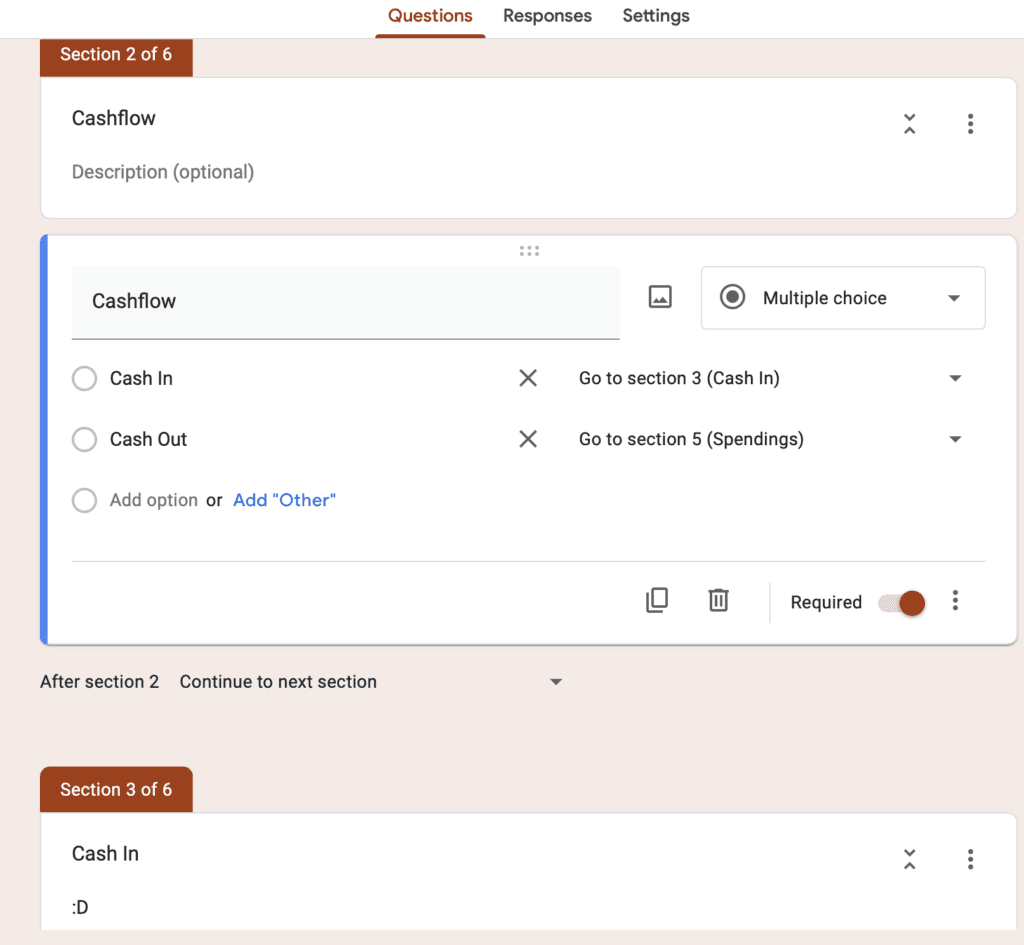
After creating the categories and data entries, I ensured that the different options (Expenditures vs Savings) are properly assigned to the different sections.
Step 2: Testing Out Functionality of Google Forms
After testing out google forms, you can tie up loose ends and fix any small problems you face in the data collection process.
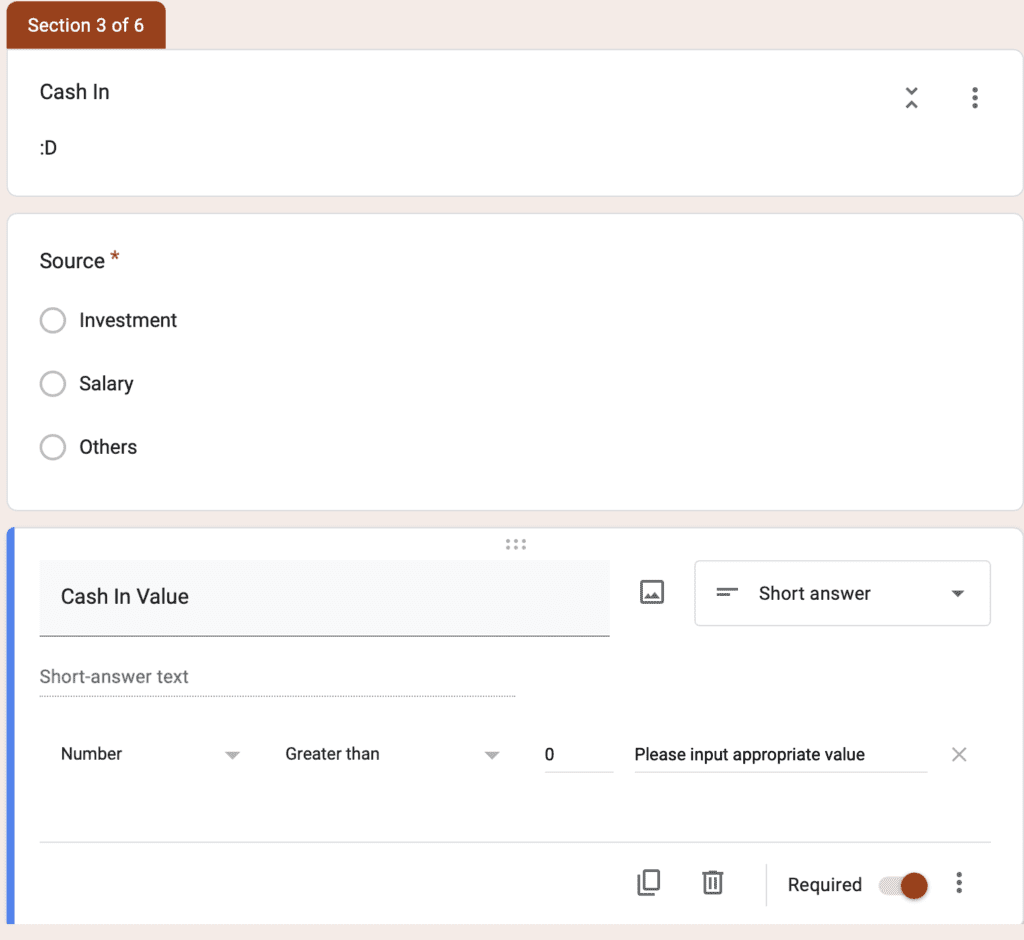
For example, when typing in the $ value, you might accidentally add in a symbol or letter by accident. This will affect the calculations of the different categories and result in inaccuracies.
What you can do is to add a response validation such that the value inputted is a number (greater than 0).
Step 3: Organising Data in Google Sheets
Overview of my finances
SUMIFS to automate calculation of values
Using the SUMIFS method I have learnt, I was able to successfully generate this entire spreadsheet of data into the subcategories I require.
For instance: =(SUMIFS((‘Finance Responses’!Q:Q),’Finance Responses’!D:D,”*Cash Out*”,’Finance Responses’!P:P,”*F&B*”))
This function represents the total sum of all values recorded under Food and Beverages (sub-category of expenditures/Cash Out).

Additionally, the SUMIFS function can also be narrowed down to even greater detail, even down to the particular date range. As shown above, the google sheet is for the overall calculations of my annual expenses and earnings.
Function used: =(SUMIFS((‘Finance Responses’!Q:Q),’Finance Responses’!D:D,”*Cash Out*”,’Finance Responses’!P:P,”*F&B*”,’Finance Responses’!B:B,”>=”&B2,’Finance Responses’!B:B,”<“&D2))
By adding the criteria [‘Finance Responses’!B:B,”>=”&B2,’Finance Responses’!B:B,”<“&D2], the date range for the resulting value is set between 1st January 2023 (Cell B2) and today’s date (Cell D2). This helps to retrieve the sum of all values in ‘Finance Responses’!Q:Q (Column Q), under the F&B category, within the date range we have specified.
What I really enjoyed about this was that the level of customisation was up to you. For example, I used functions such as drop-down lists (named ranges) so that I can filter out and review my finances within specific date ranges.
CONCATENATE and ARRAY FORMULA to display all entries together
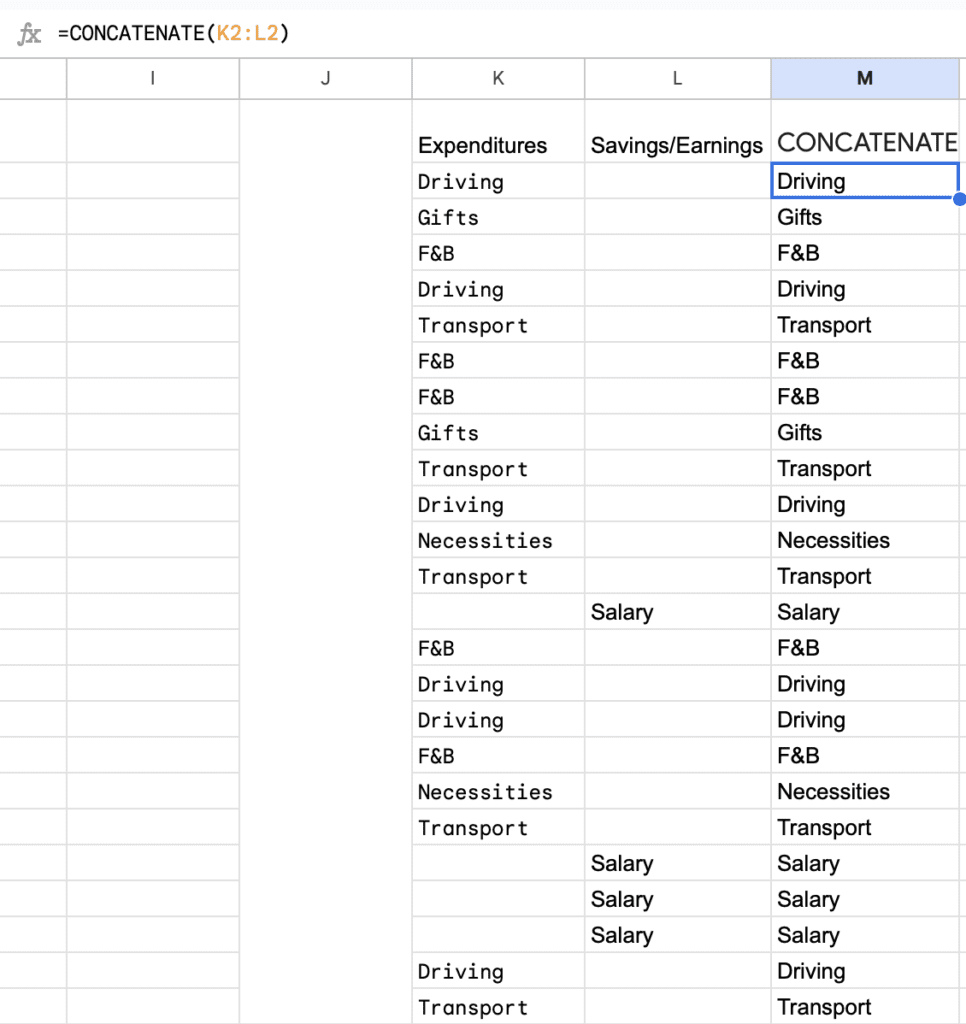
As the google form submission entries (for Cash In/Cash Out entries) are separated into different columns, it is less user friendly when displayed in a table format.
Hence, the function I used to display and combine all the entries regarding either expenditures in one column for quick viewing was:
=ArrayFormula(CONCATENATE(‘Finance Responses’!P2,’Finance Responses’!G2))
Note: ‘Finance Responses’!P2 column indicates the type of category of expenditures, while ‘Finance Responses’!G2 column indicates categories under earnings in google form responses.
Step 4: Importing Data into Google AppSheet
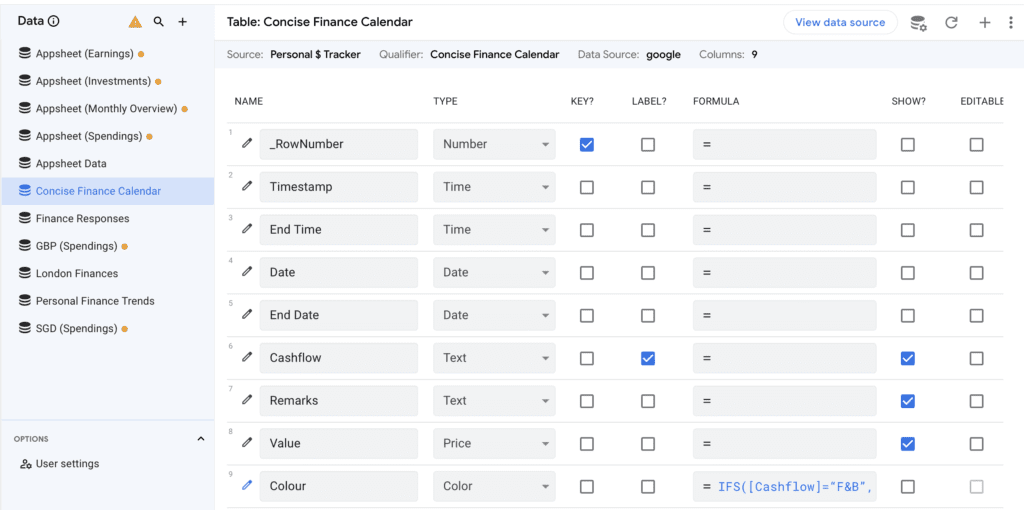
Following that, I extrapolated all this data into a suitable format for a usable mobile application under Google AppSheet. As a result, I could combine both google forms and data collation of google sheets into a single platform.
Firstly, I imported the google forms using the Appsheet add-on plug in.
Secondly, I imported the required google sheets data into Google Appsheet, creating different google sheets to segregate and display information separately.
Step 5: Experimenting with App Interface
After working on ensuring the functions and calculations are all in place, it is finally time to work on the design and user interface for the app.
Here is how I used the app to display a breakdown of my expenditures into the different categories:
- Adding a Secondary Google Form
- Formatting a Monthly Overview Page
- Inserting an Annual Overview Page
- Including a Calendar View as the Main Interface
- Making Dashboard Views
Adding a Secondary Google Form
At the same time, I was wondering: how can I use this in London as an international student without having to manually do the currency conversion calculations in my head?
Initially, I considered changing the entire layout of my initial google form to incorporate a currency change function. However, I did not proceed with this idea (I was feeling kinda lazy 😬).
On the other hand, the other solution which I had was to create a secondary google form. This is so that I can separately track and assess my spending and saving habits while studying overseas vs back in Singapore.
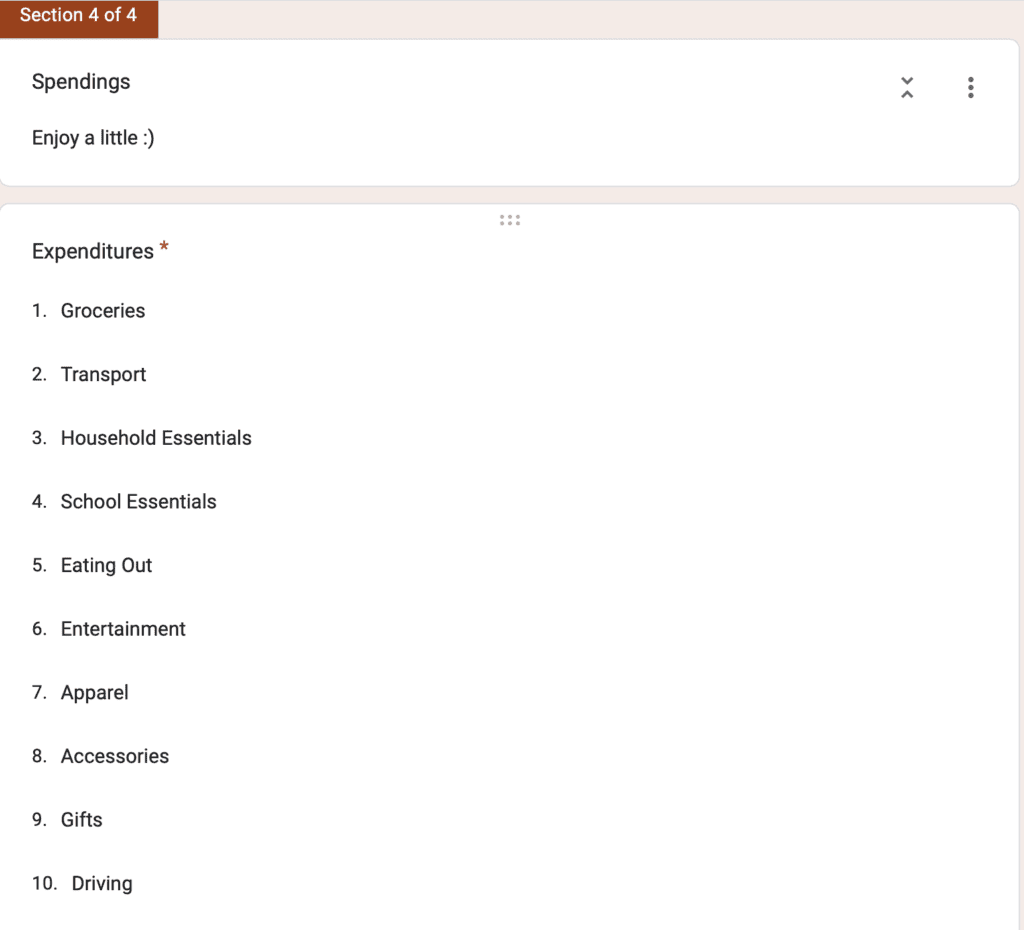
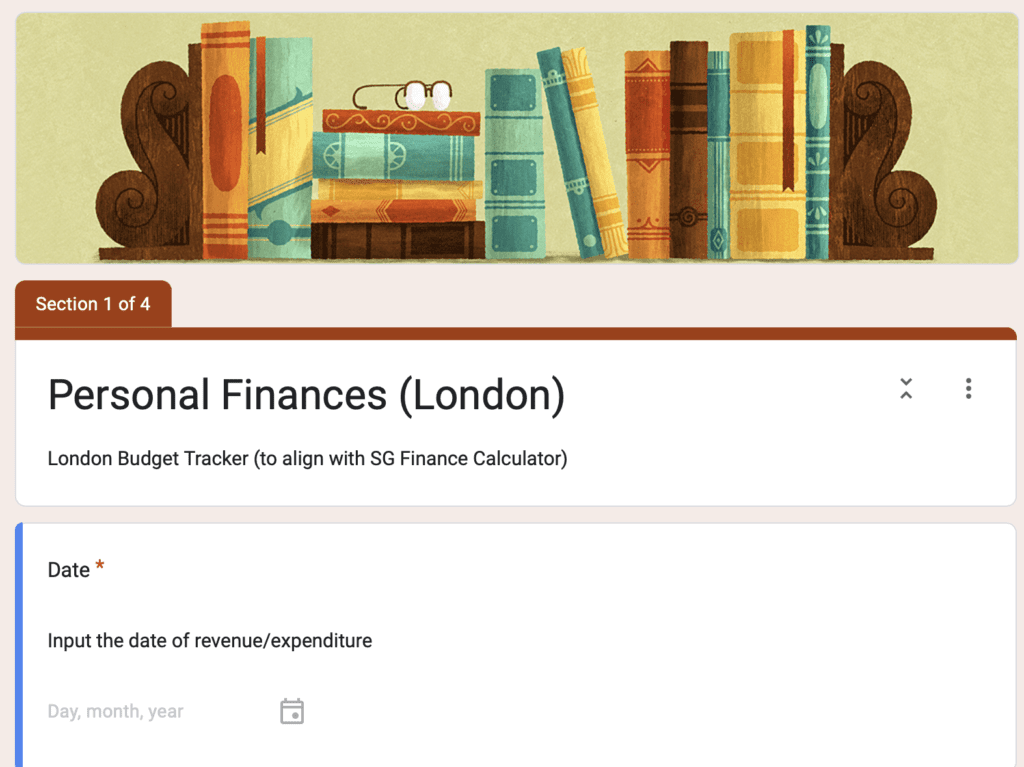
I created a new google form to accept new entries, that was segregated differently from my initial google form. Additionally, I decided to categorise it differently based on how I wished to track my spending habits there.
For Instance: I decided to split Food & Beverages option into two separate forms of expenditures: Groceries and Eating Out.
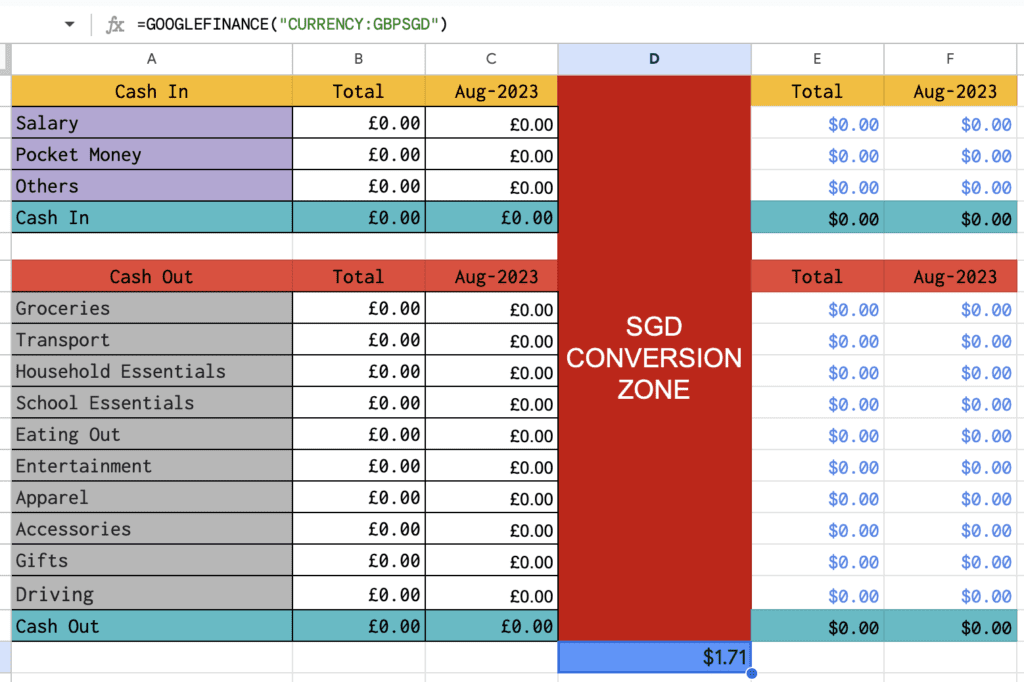
In order to combine the responses of both Google Sheets, I utilised Google’s currency exchange rate to convert the value of the entries into my home currency.
=GOOGLEFINANCE(“CURRENCY:GBPSGD”)
This ensures that I can combine entries/values from both forms into my monthly and annual overviews (in SGD currency).
However, do take note this is only a rough estimate as the exchange rate does fluctuate. Furthermore, the currency conversion calculator might not be accurately representative of the exchange rate of your personal transactions.
Formatting a Monthly Overview Page
After creating the app, it was quite rewarding and useful to see how I could use it to seamlessly identify the proportions of my expenditures within a month. This was done using the SUMIFS function in Google Sheets, and then imported into Appsheets to be displayed as pie chart.
Inserting An Annual Overview Page
Initially, I had an overview page to allow myself to review my finances from specific time periods to review my finances within different ranges.
Including a Calendar View as the Main Interface
The previous layout consolidating the entries was an excel table with a lot of unnecessary information.
Finding it rather aesthetically unpleasant, I decided to beautify the interface slightly.
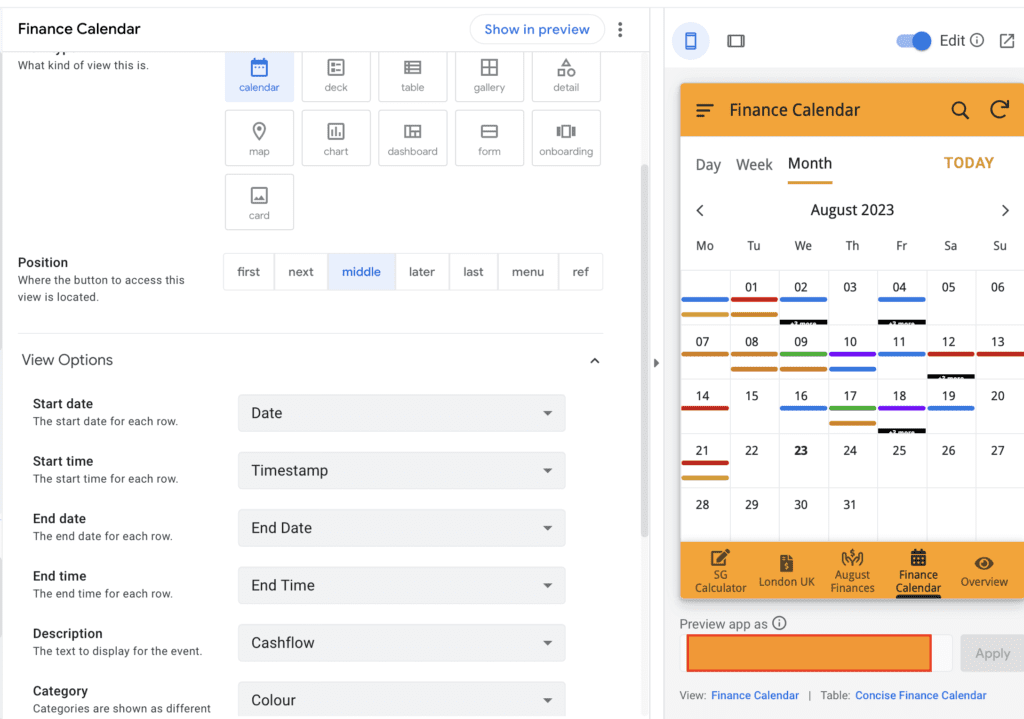
Hence, I added in a new Calendar view to better visualise how my expenses were spread out through the months, weeks and days.
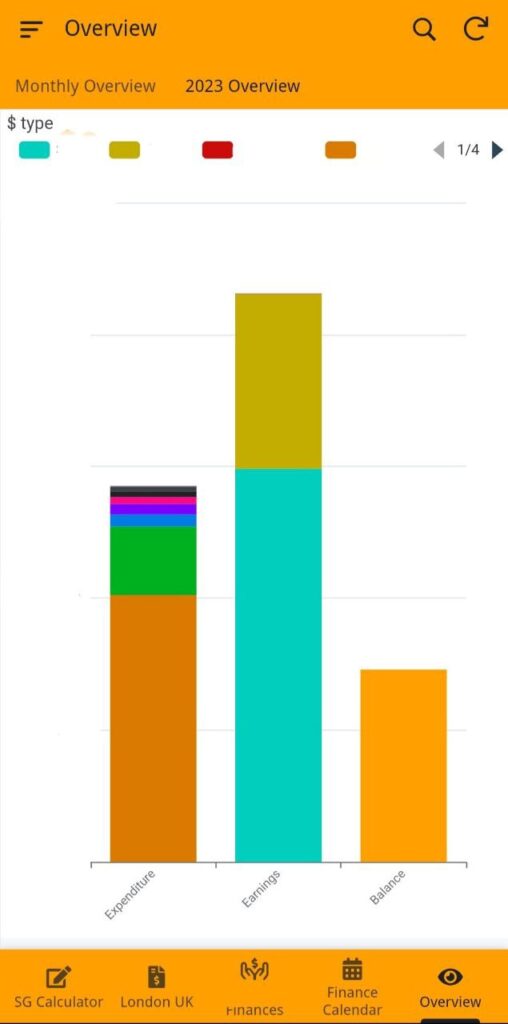
However, I found it rather redundant after a few months. Thus, I changed my custom tracker to an annual finances overview to better suit my needs.
This represents an annual overview for year 2023, which I put in bar graph format to indicate the different proportions of spendings & savings.
Customising Data from Google Form Responses
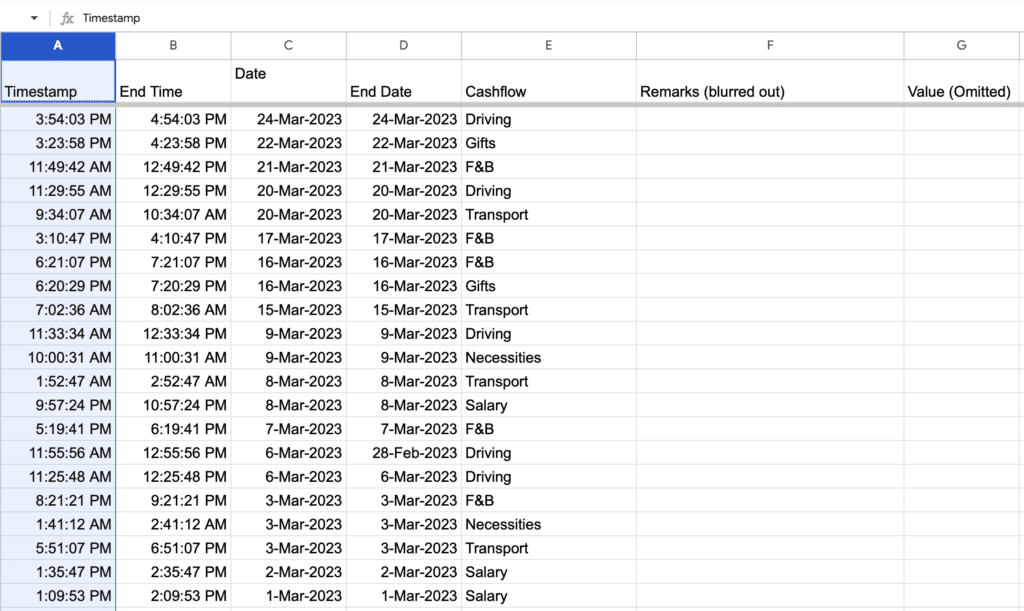
After using the ArrayFormula function to display the necessary rows, I went ahead to set the view options to the appropriate rows as shown below.
Making Dashboard Views
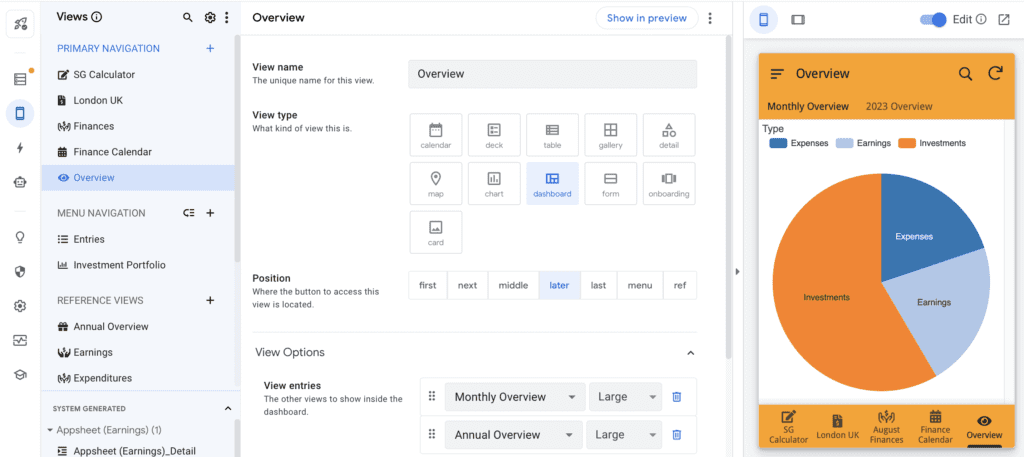
By creating a dashboard view, I was able to incorporate different views (both the monthly overview and annual overview) into one overview tab.
Similarly, I also placed different tabs under my monthly finances page:
- Overall Monthly Spendings (Spendings)
- Overall Monthly Earnings (Earnings)
- Expenditures in Singapore (SG)
- Expenditures in London (UK)
Concluding Thoughts
All in all, these are some of the steps I took along the way to build this finance app from scratch.
Undoubtedly, there are many areas for improvement for the app design, convenience and usability, as I am very much an amateur in this.
After creating the app, I thought of how awesome it would be to incorporate my own financial data from banking institutions and automate the updating process. While this is a feature present in some of the already available public apps, what deterred me from doing so was:
1)The potential lack of security & privacy breach that could occur if I provide such sensitive information to third-party softwares
2)Having to manually key in helped me to be more aware of my spending habits, which was one of my primary goals going about this
Looking Back… 🧐
Wanting to capitalise on some of the new functions in google sheets/forms that I have learnt and dabbled in, I found it enjoyable and satisfying to have created this on my own.
One of the reasons why I decided to invest some time into creating this was to cultivate a habit of financial prudence. I wanted to be able to develop good financial habits – budgeting well to spend on things that matter.
It was a colossal waste of time ⌛️ – in terms of actual utility, but also an extremely rewarding use of my free time. Troubleshooting and dissecting these issues one by one, crafting a rough outline of the app, were all part of the trial & error process.
I also felt a need to send a reminder to myself here to not be so caught up on finances. While practising financial prudence and improving my financial literacy, it is important to use the money wisely on fulfilling experiences with others.
Do What You Want To Do! 🙂
Upon reflecting on this journey, I wanted to share this with others: do what you want to do!
It doesn’t matter if there is someone better at it than you or if the idea sounds stupid to you initially (unless it really is even after thinking it through for a while). If you have the capacity to do so, don’t neglect your passion projects due to fear of judgement.
Thank you for listening to Ted-Talk 😛
Do leave a comment before if you found it helpful, or if you require some clarifications on anything mentioned here~

Pingback: Introducing Boba Finances! – Your Money, Your Rules 🧋